Today we’ll build a related posts block with Advanced Custom Fields (ACF) Pro. There are existing plugins that can do this kind of thing, but for a small thing like just adding a block, it’s nice to keep your code lean and build the block yourself, with just what you need.
With ACF Pro, we can build Gutenberg blocks with just HTML, PHP and browser based JavaScript. That’s awesome, because as WordPress developers, we already know those languages.
First you need to install the ACF & ACF Pro plugins.
Table of Contents
- Create a Custom Plugin
- Creating the Block
- The acf_register_block_type function
- Point to a Template File Containing the Block Code
- Create the template file for the block
- Wire the registered Block up to an ACF Custom Field Group
- Viewing the new block in the posts edit screen
- Setting up Custom Fields for the Block
- Populate the Dropdown Select with Posts
- The acf/load_field hook
- Getting the Posts and Setting the Choices
- Pass the post data back to ACF so that it can populate the dropdowns
- Rendering the block on the front end
- Set the return value of the Related Posts 1 Field
- Write the Code to Render the Custom Block
- On the Front End
- Duplicate and modify the the dropdown selects
- Code the rest of the related posts on the front end
- The Output
- The Full Code
Create a Custom Plugin
You should write the following code in a child theme, or a custom plugin so that you don’t lose the code when you update your existing theme. A plugin is the best option so that the functionality is available to any theme you activate rather than being limited to the child theme you’re using.
Creating the Block
ACF Pro allows you to use its framework to create a block in PHP. We’ll start by registering the block.
The main file for my custom plugin is clario-custom-functionality.php. In it I’m going to add the following code:
if( function_exists('acf_register_block_type') ) { // check function exists

  add_action('acf/init', 'clario_related_posts_gutblock');
  function clario_related_posts_gutblock() {

    acf_register_block_type(array(
      'name'              => 'related posts',
      'title'             => __('Related Posts'),
      'description'       => __('A custom block that displays hand picked related post.'),
      'render_template'   => plugin_dir_path(__FILE__) . 'template-parts/blocks/related-posts.php', // a template file for the block code
      'category'          => 'theme',
      'icon'              => 'grid-view',
      'keywords'          => array( 'related posts', 'hand picked posts' ),
    ));
  }
}
I’m first checking that the acf_register_block_type function exists – this allows us to deactivate the ACF plugins without breaking the site. If we tried to call that function and it wasn’t accessible it would cause a PHP fatal error. We can then hook the block onto the acf/init hook.
I have prefaced my clario_related_posts_gutblock function with clario so that it doesn’t conflict with other third party or WP functions which is WP best practice.
The acf_register_block_type function
The acf_register_block_type function takes an array of settings. Excluding render_template which we’ll look at below, there are a number of descriptive ones such as name, title, and description and some others that control how the block is shown and searched for on the admin screen.
The category field designates where in the block menu the block is shown when you select from the plus sign in the top left corner of the post:
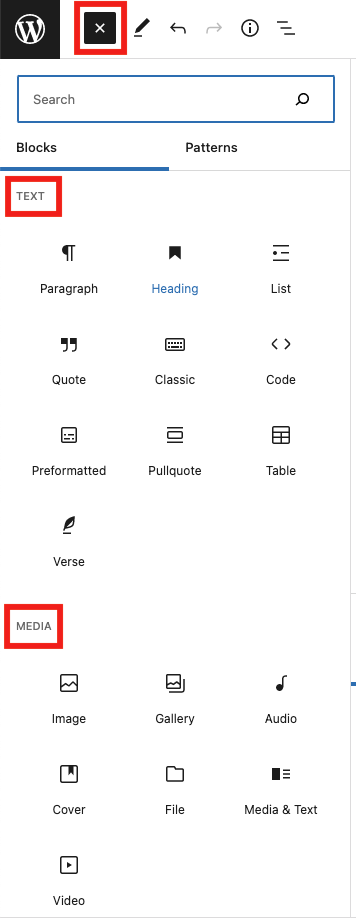
The icon element is what’s setting the icons in the above image and also shows up when you choose a block using a forward slash from inside the post itself. The keywords help with search in the search box.
Point to a Template File Containing the Block Code
The render_template element points at a file we are going use to code out the HTML and PHP for the block itself. At the time of writing there is a bug in the ACF Gutenberg getting started document which suggest you could write this line like this:
'render_template' => 'template-parts/blocks/related-posts.php',however you do need to preface that filepath with ‘plugin_dir_path(__FILE__)’ otherwise ACF won’t be able to find – it’ll fail silently and you won’t know why you aren’t getting a any content on the admin screen or the front end. (that’s the reason we can now save this file without breaking anything even though the template file is not there). Let’s create the file now anyway.
Create the template file for the block
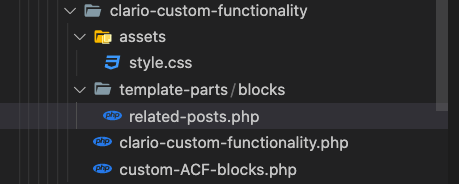
Under my main plugin directory (clario-custom-functionality) I’ve created folders and a file: template-parts/blocks/related-posts.php which matches the filepath in the render_template array element:
Wire the registered Block up to an ACF Custom Field Group
Now we want to wire our registered block in the code up to a custom field group in ACF. This will allow us to create input fields that we can display to the user in the new block on the admin screen.
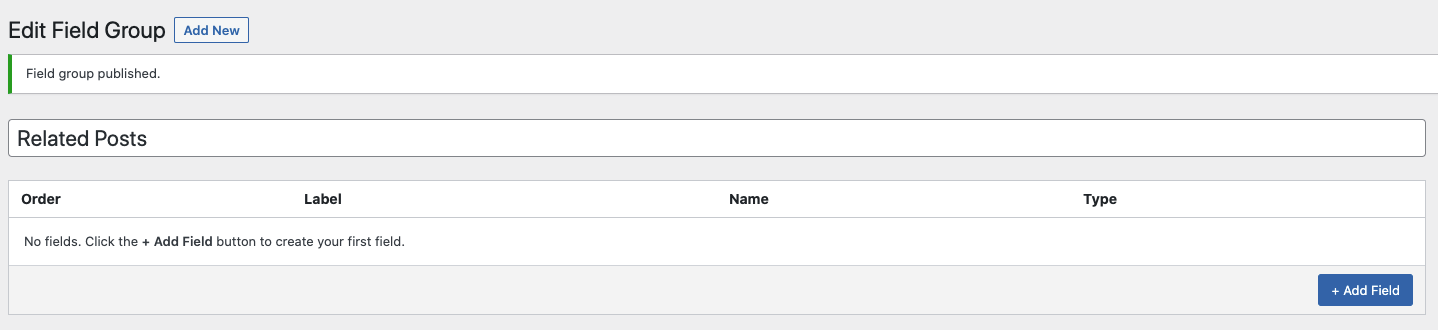
We need to create that field group first, so navigate to Dashboard > Custom Fields > Field Groups and click on ‘Add New’.
You’ll see a page that looks like this:
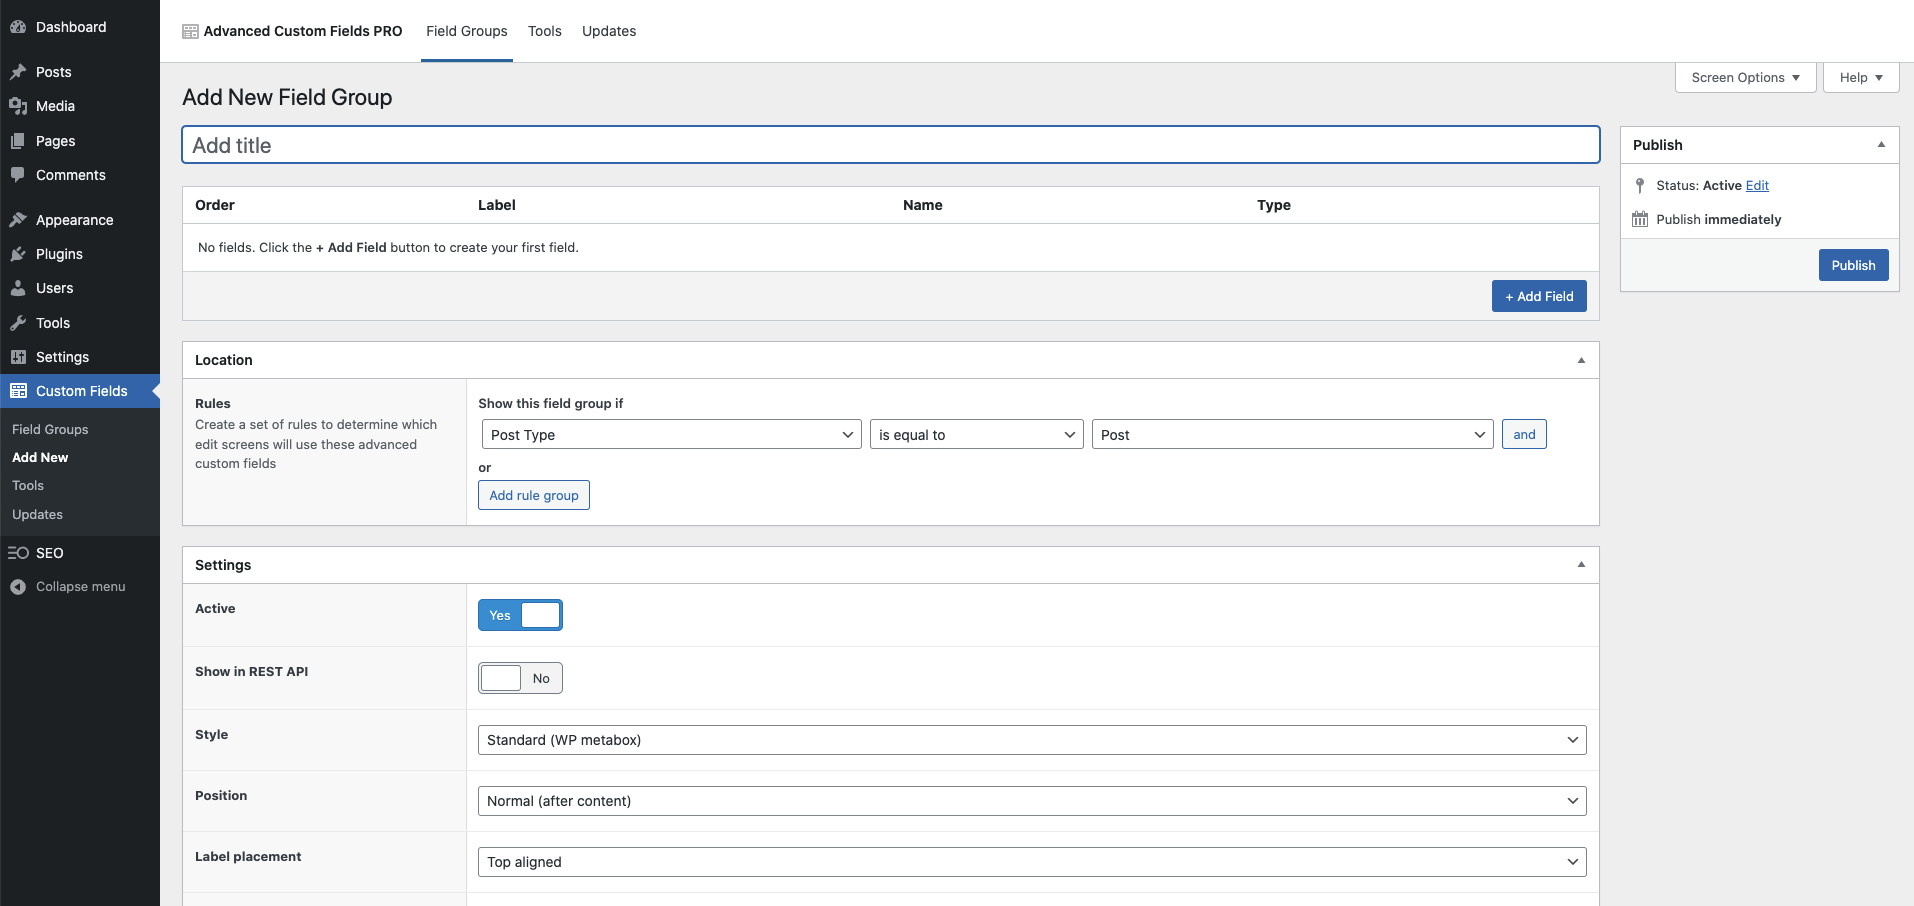
First add a title to the ‘Add title’ field – it can be whatever you want – I’m using Related Posts.
The bit we want to focus on now is the Location metabox in the middle:

The ‘Show this field group if’ field allows us to designate where in the WP admin screens a field group would show up. There are lots of options here because custom fields can be in all sorts of places – pages, posts, settings screens, menus etc:
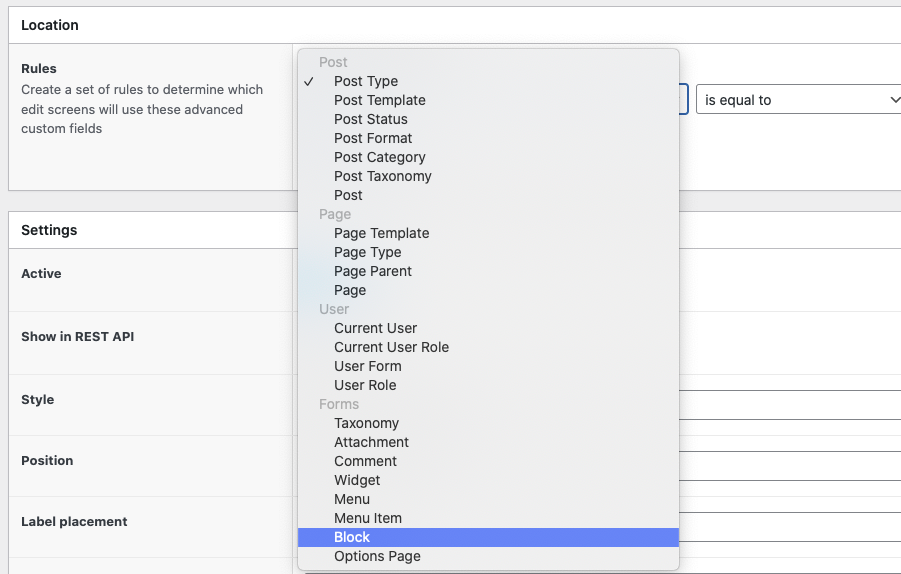
Choose ‘Block’ here, keep the second dropdown as ‘is equal to’ and you’ll see that the last dropdown contains an option called ‘Related Posts’:

ACF is populating this field with the name data from our register block function! Choose Related Posts and publish the field group.
Viewing the new block in the posts edit screen
Now that the field group is created and pointed at the Related posts block, when we go to a post edit screen in the back end, we can see the block there. It is available in the main page editor by typing slash and starting to type ‘related posts’ (/rela…..)

Or in the toggle block inserter functionality, under the THEMES category:
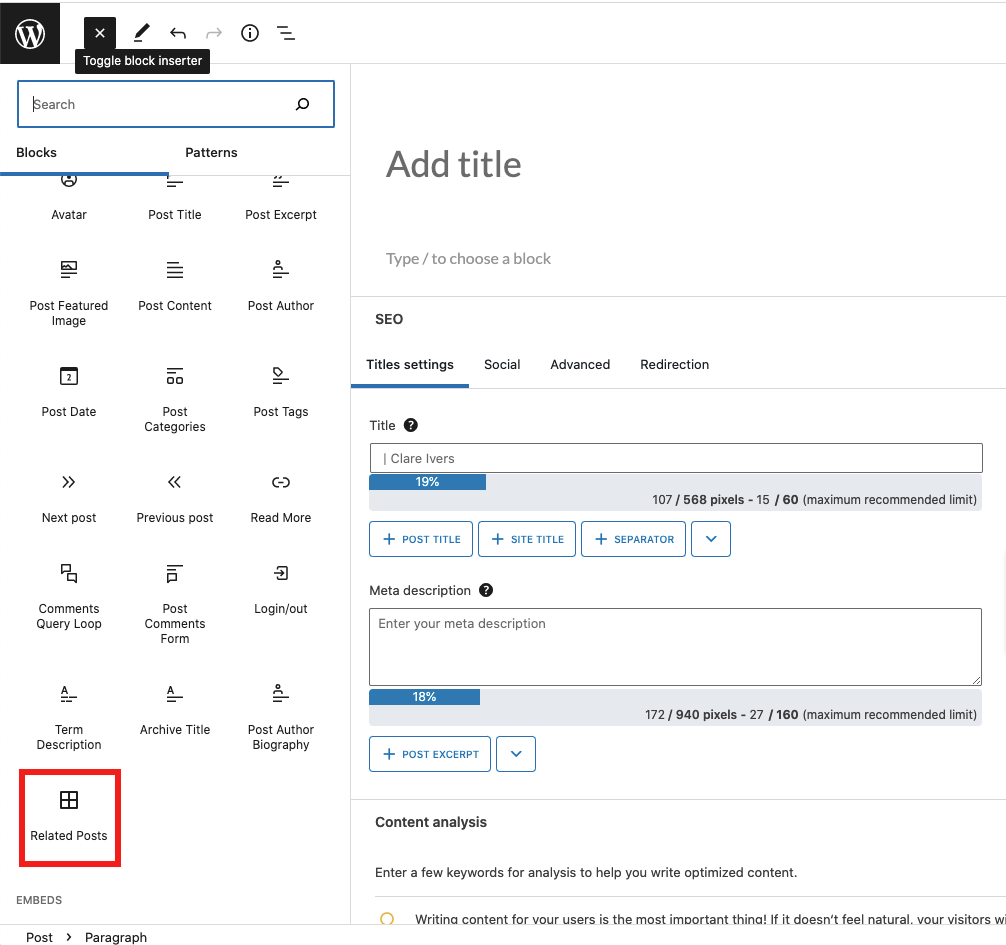
You can add the block to your post and save the post. The block will be empty so you wont see much, but we’ll fix that now.
Setting up Custom Fields for the Block
We need to add fields to the Related Posts field group, and write the code to make them show up both in the edit functionality of the block and on the font end.
Within our block we want to display posts that are similar to the one the user is reading on our page. We can use it in a post to alert the reader to other things they might like to read on our site. We’ll do that by providing some dropdowns that show all the posts that are in our site and allow the author to pick from it.
In the Related Posts field group we’ll add some dropdown fields (Dashboard > Custom Fields > Field Groups):
Click on the Add Field button and add a name (Related Post 1 for me) and choose select as the field type:
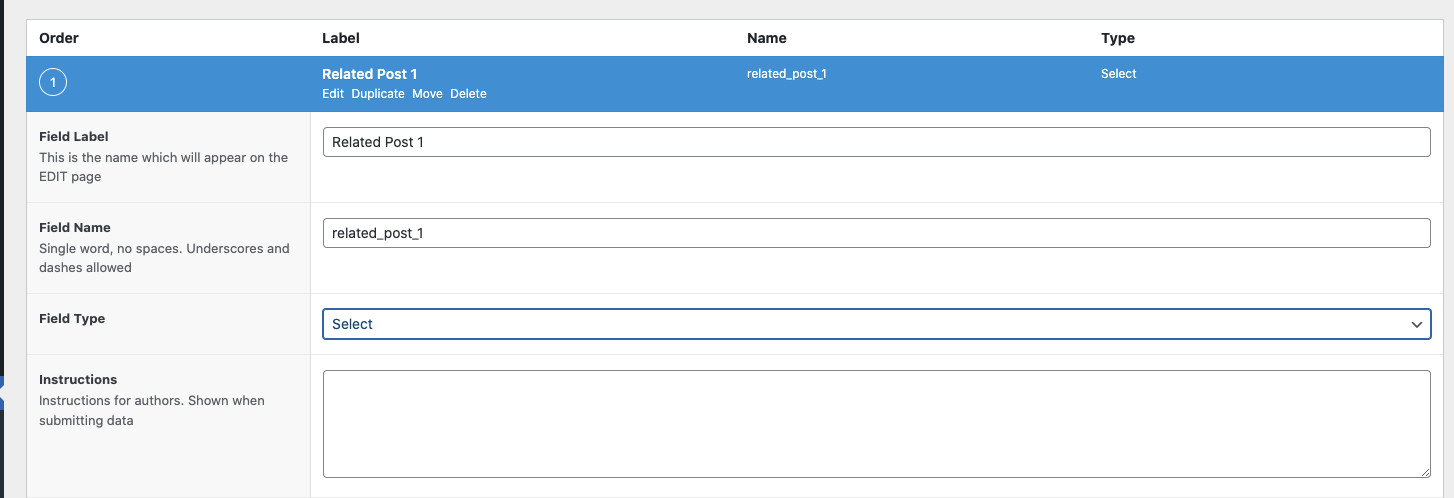
Note that the field name is automatically set by ACF to be related_post_1 which is the name field but with underscores. We’ll use this later. We’ll create one field, build it out and then duplicate and edit for the rest.
Populate the Dropdown Select with Posts
Now we need to populate the dropdown with posts for the user to select from. We can do that using the acf/load_field hook. I’m adding the following code to my custom-ACF-blocks.php file.
function clario_populate_related_posts_field( $field ) {

  $field['choices'] = array();

  $post_details = array(
    'numberposts'      => -1,
    'orderby'          => 'title',
    'order'            => 'ASC',
    'post_type'        => 'post',
    'fields'           => 'ids',
  );

  $choices = get_posts($post_details);

  if( is_array($choices) ) {
    foreach( $choices as $choice ) {
      $field['choices'][ $choice ] = get_the_title($choice);
    }

  }

  return $field;
}

add_filter('acf/load_field/name=related_post_1', 'clario_populate_related_posts_field');
The acf/load_field hook
The acf/load_field hook works by identifying a particular field from the field groups and passing it to the callback. I’ve done that in the above code by setting the name parameter on the hook to the name of the field that I told you to remember above – related_post_1:
add_filter('acf/load_field/name=related_post_1', 'clario_populate_related_posts_field');With this hook, you can apply your code to all the fields, or by type (eg, select) or by name, like we are:
// Apply to all fields.
add_filter('acf/load_field', 'my_acf_load_field');

// Apply to select fields.
add_filter('acf/load_field/type=select', 'my_acf_load_field');

// Apply to fields named "custom_select".
add_filter('acf/load_field/name=related_post_1', 'my_acf_load_field');

// Apply to field with key "field_123abcf".
add_filter('acf/load_field/key=field_123abcf', 'my_acf_load_field');
Getting the Posts and Setting the Choices
This is my callback to the acf/load_fields hook:
function clario_populate_related_posts_field( $field ) {

  $field['choices'] = array();

  $post_details = array(
    'numberposts'      => -1,// get all
    'post_status'      => 'publish' // only published
    'orderby'          => 'title', // order by title
    'order'            => 'ASC', // order ascending by title
    'post_type'        => 'post', // get only posts (not other post types)
    'fields'           => 'ids', // only return post ids, not all post data
  );

  $choices = get_posts($post_details);

  if( is_array($choices) ) {
    foreach( $choices as $choice ) {
      $field['choices'][ $choice ] = get_the_title($choice);
    }

  }

  return $field;
}
In my code I’m using the WP get_posts() function to get an array of post IDs. The function takes an array that defines which posts you want to get.
| Array Element | Value | Meaning |
| numberposts | -1 | This is a count of posts. -1 means just get all of them. |
| post_status | publish | Get only posts that have a status of published |
| orderby | title | Order the output by post title |
| order | ASC | A companion element to the orderby element – it says, order the output by the orderby element, in ascending order |
| post_type | post | Get only blog posts – don’t get pages, products or any other type of custom posts |
| fields | ids | Which fields to return from the resulting posts – in this case we are returning only the IDs. The default for this element is all the data for the post including the page content which we don’t need here. |
There is a huge amount of functionality provided by this array and you can see all the possibilities in the parameters for WP_Query.
Below the call to get_posts I’m building the $field variable that ACF will use to populate the dropdowns – described below.
Pass the post data back to ACF so that it can populate the dropdowns
ACF expects the choices for the dropdown to be in the ‘choices’ field of the array. The value of that field is going to be another array with post ID and post title as key-value pairs. So I am looping through the posts and assigning the ID (in the $choice variable) and post title (accessed through the WP get_the_title function) to that child array in this line of code:
$field['choices'][ $choice ] = get_the_title($choice);Then I’m returning $field variable to ACF and ACF is using it to populate the dropdown in the edit panel of the block on my post. If you go back to your post you’ll see that there is a Related Post 1 field now, populated with all the published posts on the site:
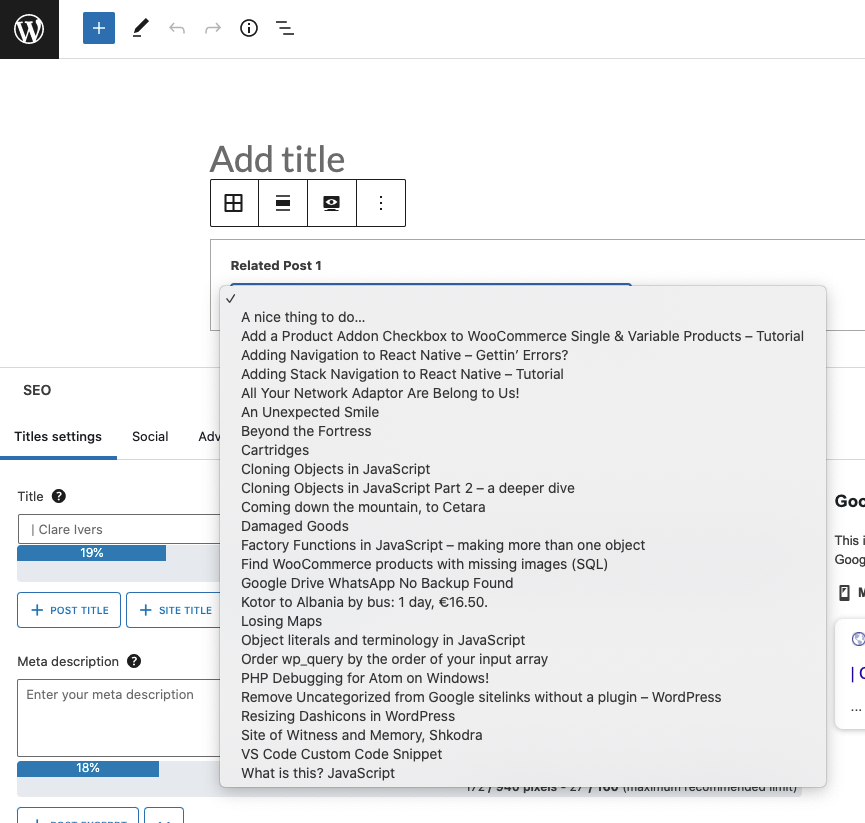
Select a post in the dropdown, save the post, and ACF will save the field for you.
Rendering the block on the front end
Now we’ll set the field up and write the code to render the block on the front end.
Set the return value of the Related Posts 1 Field
Now we need to write the code to render the block on the front end. First, change the return value on the Related Posts 1 config to be ‘Both (Array)’:

In our case, the value is the post ID and the label is the post title, so we can use both in our code.
Write the Code to Render the Custom Block
To render the block on the front end, we’ll use the template file we created way back at the beginning – template-parts/blocks/related-posts.php. I’ve added this code to it:
<?php
/**
 * Related Posts custom block
 *
 * @param   array $block The block settings and attributes.
 * @param   string $content The block inner HTML (empty).
 * @param   bool $is_preview True during AJAX preview.
 * @param   (int|string) $post_id The post ID this block is saved to.
 */

$post  = get_field('related_post_1');

?>
<div class="gutblock-related-posts-box">
  <div class="gutblock-related-post-title">
    <?php echo $post['label']; ?>
  </div>
  <div class="gutblock-related-post-image">
    <?php echo get_the_post_thumbnail($post['value']); ?>
  </div>
</div>
What I’m doing is using the ACF function get_field() to get the value of the Related Posts 1 field that we’ve set on the block in the post edit screen.
I’m passing it the field name of the field (‘related_post_1’). I don’t need to pass it the post ID because we are within the context of the current post and that is populated automatically for me. It’s giving me back the post ID (value) and post title (label) in an array:
[02-Jul-2022 20:29:47 UTC] Array
(
    [value] => 1015
    [label] => Factory Functions in JavaScript – making more than one object
)
I’m printing out the label straight to the screen for the title component and using the ID in the WP function get_the_post_thumbnail() to get the image tag of the featured image for the post. It takes a post ID and it’s passing me back this:
<img width="1000" height="750" src="https://myblog.local/wp-content/uploads/2022/05/IMG20190520163404.jpg" class="attachment-post-thumbnail size-post-thumbnail wp-post-image" alt="White Bay Power Station, Rozelle, Sydney" srcset="https://myblog.local/wp-content/uploads/2022/05/IMG20190520163404.jpg 1000w, https://myblog.local/wp-content/uploads/2022/05/IMG20190520163404-300x225.jpg 300w, https://myblog.local/wp-content/uploads/2022/05/IMG20190520163404-768x576.jpg 768w" sizes="(max-width: 1000px) 100vw, 1000px" />For the header comments, I’ve copied them from the ACF documentation on rendering a block template (see section 3) and edited them according to my block.
On the Front End
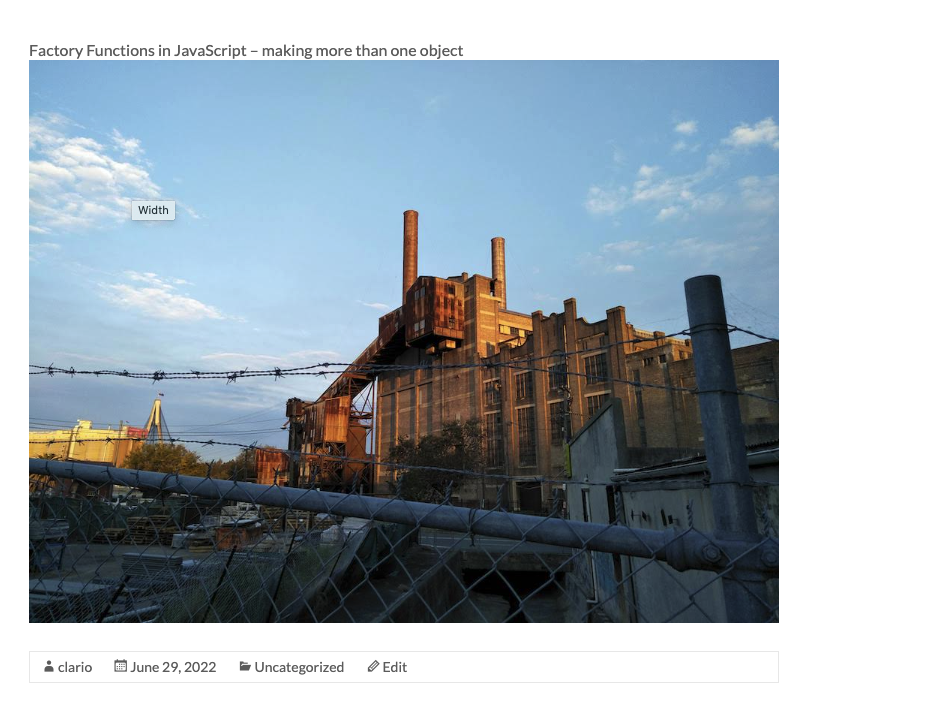
Here’s what I’m getting on the front end of my post – the post title and thumbnail of the post chosen from the dropdown:
Duplicate and modify the the dropdown selects
I’m going to duplicate our Related Posts 1 field now so that we have three dropdown selects in the backend. To do this, you literally only have to go to the field and click duplicate twice. ACF will increment the number 1 on the field each time. Now I have:

You’ll see if you look back at the post edit page that all three dropdowns are there, and they’re all populated. They’re populated because ACF has duplicated them from the original one because it was already populated. If we want them all to update when a new post is published on our site we need to hook them all up separately to our function that populates the dropdowns using the acf/load_field hook:
add_filter('acf/load_field/name=related_post_1', 'clario_populate_related_posts_field');
add_filter('acf/load_field/name=related_post_2', 'clario_populate_related_posts_field');
add_filter('acf/load_field/name=related_post_3', 'clario_populate_related_posts_field');
Code the rest of the related posts on the front end
We only have one of the related post dropdowns showing up on the front end, so now we need to add the other two. I’m going to put all three in an array and loop through it to generate the HTML markup:
$posts = array();
$posts[]  = get_field('related_post_1');
$posts[]  = get_field('related_post_2');
$posts[]  = get_field('related_post_3');
Here’s what that array looks like:
[03-Jul-2022 07:01:45 UTC] Array
(
    [0] => Array
        (
            [value] => 1015
            [label] => Factory Functions in JavaScript – making more than one object
        )

    [1] => Array
        (
            [value] => 839
            [label] => Cloning Objects in JavaScript
        )

    [2] => Array
        (
            [value] => 1113
            [label] => Cloning Objects in JavaScript Part 2 – a deeper dive
        )

)
Now I’ll loop through it and generate HTML:
$posts = array();
$posts[]  = get_field('related_post_1');
$posts[]  = get_field('related_post_2');
$posts[]  = get_field('related_post_3');

error_log(print_r( $posts, true ));
?>
<div class="gutblock-related-posts-box">
  <h2>RELATED POSTS</h2>
  <hr/>
  <div class="gutblock-related-posts">
    <?php foreach ( $posts as $post) : ?>
      <a class="gutblock-related-post" href="<?php get_permalink($post['value']) ?>">
        <div class="gutblock-related-post-title">
          <?php echo $post['label']; ?>
        </div>
        <div class="gutblock-related-post-image">
          <?php echo get_the_post_thumbnail($post['value'],[250,333]); ?>
        </div>
      </a>
    <?php endforeach; ?>
  </div>
</div>
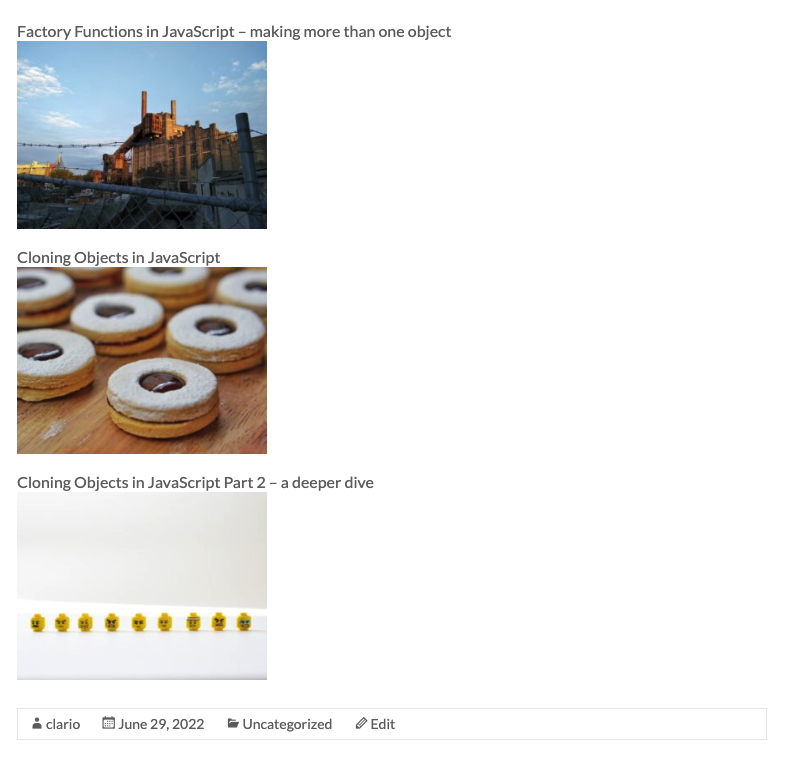
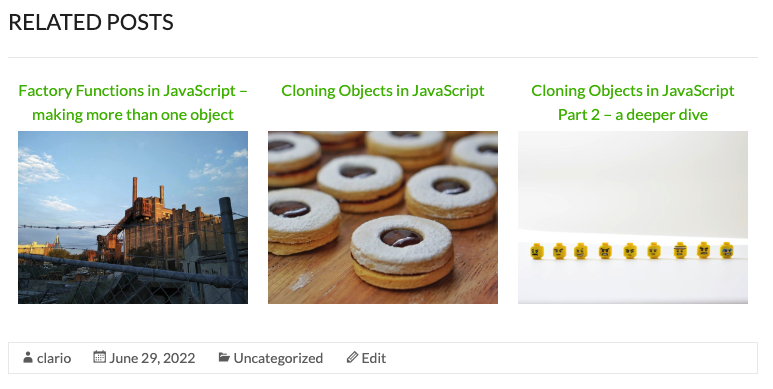
Now if I select different posts from the three dropdowns, this is what I get on the front end:
There it is, we’re most of the way there. Now we just need to apply some css. You can throw in any kind of css you want, but here’s what I’ve used, with provision for smaller screens and desktop:
.gutblock-related-posts {
  display: flex;
  flex-direction: column;
}

.gutblock-related-posts-box hr {
  margin: 0 0 10px 0;
}

.gutblock-related-posts .gutblock-related-post {
  display: flex;
  flex-direction: row-reverse;
  justify-content: left;
  border-bottom: 1px solid grey;
  margin: 10px;
}

.gutblock-related-post-image {
  max-width: 33%;
  margin-right: 20px;
}

.gutblock-related-post-title {
  margin-bottom: 5px;
  font-weight: 400;
  text-align: center;
  font-size: 16px;
  line-height: 24px;
  text-align: left;
}

@media (min-width: 900px) {

  .gutblock-related-posts {
    display: flex;
    flex-direction: row;
  }

  .gutblock-related-posts .gutblock-related-post {
    flex-basis: 33.33%;
    display: flex;
    flex-direction: column;
    justify-content: space-between;
    border-bottom: unset;
  }

  .gutblock-related-post-image {
    max-width: unset;
    margin-right: unset;
  }

  .gutblock-related-post-title {
    margin-bottom: 5px;
    font-weight: 400;
    text-align: center;
    font-size: 16px;
    line-height: 24px;
  }
}
Put the above in a file at <your-plugin>/assets/style.css and then load the stylesheet. Then you need to load that stylesheet with the WP enqueue hook – throw this at the top of your main plugin file below the header info:
function clario_add_scripts(){

  wp_enqueue_style( 'clario-main-styles', plugins_url( 'assets/style.css', __FILE__ ), '', '1.0' );
}
add_action( 'wp_enqueue_scripts', 'clario_add_scripts' );
The Output
Here’s what my block looks like on smaller screens:
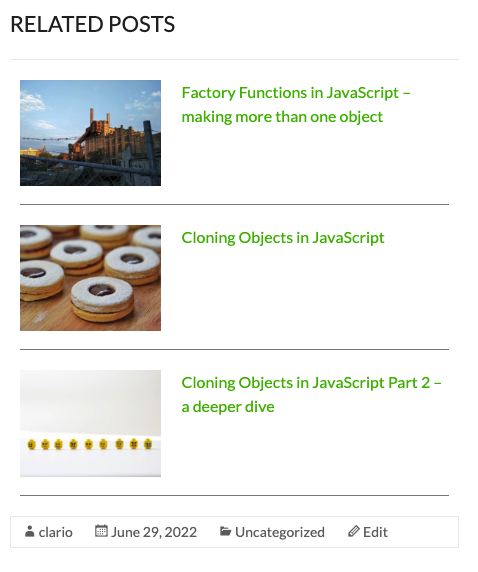
And here it is on desktop:
The featured image for this post is from Amador Loureiro on Unsplash
The Full Code
Here’s the main plugin file:
<?php

/**
 * Plugin Name:       Clario Custom Functionality
 * Description:       You know what it is, Clare Bear!
 * Version:           0.1
 * Author:            Clare Ivers
 * Author URI:        https://clareivers.com/
 * License:           GPL v2 or later
 * License URI:       https://www.gnu.org/licenses/gpl-2.0.html
 * Update URI:        https://example.com/my-plugin/
 * Text Domain:       clario-related-posts
 */

function clario_add_scripts(){

  wp_enqueue_style('clario-main-styles', plugins_url('assets/style.css', __FILE__), '', '1.0');
}
add_action('wp_enqueue_scripts', 'clario_add_scripts');

<?php

if( function_exists('acf_register_block_type') ) {

add_action('acf/init', 'clario_related_posts_gutblock');
function clario_related_posts_gutblock() {

    acf_register_block_type(array(
        'name'              => 'related posts',
        'title'             => __('Related Posts'),
        'description'       => __('A custom block that displays hand picked related post.'),
        'render_template'   => plugin_dir_path(__FILE__) . 'template-parts/blocks/related-posts.php',
        'category'          => 'theme',
        'icon'              => 'grid-view',
        'keywords'          => array( 'related posts', 'hand picked posts' ),
        'mode'	            => 'edit',
    ));
  }
}


function clario_populate_related_posts_field( $field ) {
//error_log(print_r( $field, true ));
  $field['choices'] = array();

  $post_details = array(
    'numberposts'      => -1,
    'orderby'          => 'title',
    'order'            => 'ASC',
    'post_type'        => 'post',
    'fields'           => 'ids',
  );

  $choices = get_posts($post_details);

  if( is_array($choices) ) {
    foreach( $choices as $choice ) {
      $field['choices'][ $choice ] = get_the_title($choice);
    }

  }

  return $field;
}

add_filter('acf/load_field/name=related_post_1', 'clario_populate_related_posts_field');
add_filter('acf/load_field/name=related_post_2', 'clario_populate_related_posts_field');
add_filter('acf/load_field/name=related_post_3', 'clario_populate_related_posts_field');
And the template file located in <your-plugin>/template-parts/blocks/related-posts.php
<?php
/**
 * Related Posts custom block
 *
 * @param   array $block The block settings and attributes.
 * @param   string $content The block inner HTML (empty).
 * @param   bool $is_preview True during AJAX preview.
 * @param   (int|string) $post_id The post ID this block is saved to.
 */
error_log(print_r( $block, true ));
$id       = random_int(1,100000);

$posts    = array();
$posts[]  = get_field('related_post_1');
$posts[]  = get_field('related_post_2');
$posts[]  = get_field('related_post_3');

error_log(print_r( $posts, true ));
?>
<div class="gutblock-related-posts-box">
  <h2>RELATED POSTS</h2>
  <hr/>
  <div class="gutblock-related-posts">
    <?php foreach ( $posts as $post) : ?>
      <a class="gutblock-related-post" href="<?php get_permalink($post['value']) ?>">
        <div class="gutblock-related-post-title">
          <?php echo $post['label']; ?>
        </div>
        <div class="gutblock-related-post-image">
          <?php echo get_the_post_thumbnail($post['value'],[250,333]); ?>
        </div>
      </a>
    <?php endforeach; ?>
  </div>
</div>
The stylesheet located at <your-plugin>/assets/style.css:
.gutblock-related-posts {
  display: flex;
  flex-direction: column;
}

.gutblock-related-posts-box hr {
  margin: 0 0 10px 0;
}

.gutblock-related-posts .gutblock-related-post {
  display: flex;
  flex-direction: row-reverse;
  justify-content: left;
  border-bottom: 1px solid grey;
  margin: 10px;
}

.gutblock-related-post-image {
  max-width: 33%;
  margin-right: 20px;
}

.gutblock-related-post-title {
  margin-bottom: 5px;
  font-weight: 400;
  text-align: center;
  font-size: 16px;
  line-height: 24px;
  text-align: left;
}

@media (min-width: 900px) {

  .gutblock-related-posts {
    display: flex;
    flex-direction: row;
  }

  .gutblock-related-posts .gutblock-related-post {
    flex-basis: 33.33%;
    display: flex;
    flex-direction: column;
    justify-content: space-between;
    border-bottom: unset;
  }

  .gutblock-related-post-image {
    max-width: unset;
    margin-right: unset;
  }

  .gutblock-related-post-title {
    margin-bottom: 5px;
    font-weight: 400;
    text-align: center;
    font-size: 16px;
    line-height: 24px;
  }
}