
A while back I wrote a post on how to code a product add-on that would appear on WooCommerce product pages. In that post we created a checkbox on the back end of the product page so that you could conditionally show the add-on based on whether the checkbox was checked.
Today I’m going to look at how you could instead show the add-on on all the product pages of a certain product category. To do this, we’ll create a custom tab on the WooCommerce settings page.
Table of Contents
- Create a Plugin
- Adding A Custom Settings Tab to WooCommerce
- Adding a Settings Tab to WooCommerce Settings Page
- Creating the Custom Tab – woocommerce_settings_tabs_array hook
- Adding Content to the New Settings Page
- Getting Product Categories
- Get and Output Product Categories Hierarchically
- Outputting Checkboxes
- Getting the Product Dropdown
- Putting the woocommerce_settings_prod_cat_addon Hook Together
- Add CSS Styling
- Saving Categories & Product to the Database
- Showing the Product on the Product Page
- Styling for Product Page
- Add the Addon To the Cart on “Add to Cart” Button Click
- The Full Code
Create a Plugin
Already know how to create a plugin? Jump to Create a Custom Settings Tag
As ever, I’m going to write this code in a plugin rather than a child themes so that if I want to change themes, the functionality is still available to the new theme. In my WP installation under wp-content > plugins I have created the following file structure:
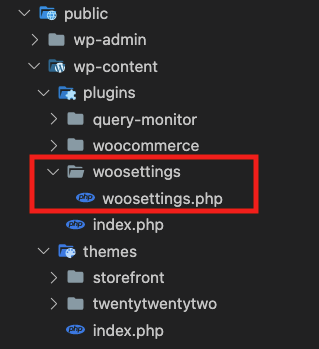
In the woosettings.php file, I have the following code sourced from the WP Plugin header requirements. You can swap my details for yours:
<?php
/**
 * Plugin Name:       Woo Settings
 * Description:       Adding a settings tab to WooCommerce
 * Version:           0.1
 * Author:            Clare Ivers
 * Author URI:        https://clareivers.com/
 * License:           GPL v2 or later
 * License URI:       https://www.gnu.org/licenses/gpl-2.0.html
 * Update URI:        https://example.com/my-plugin/
 * Text Domain:       woosettings
 */
Now in the WP Admin Dashboard under Plugins, you can activate the Woo Settings plugin:

You can also see that I’ve installed WooCommerce, which you’ll need too, so go ahead and install it. If you don’t have product and category data yet, you can import sample data from the WooCommerce plugin.
Adding A Custom Settings Tab to WooCommerce
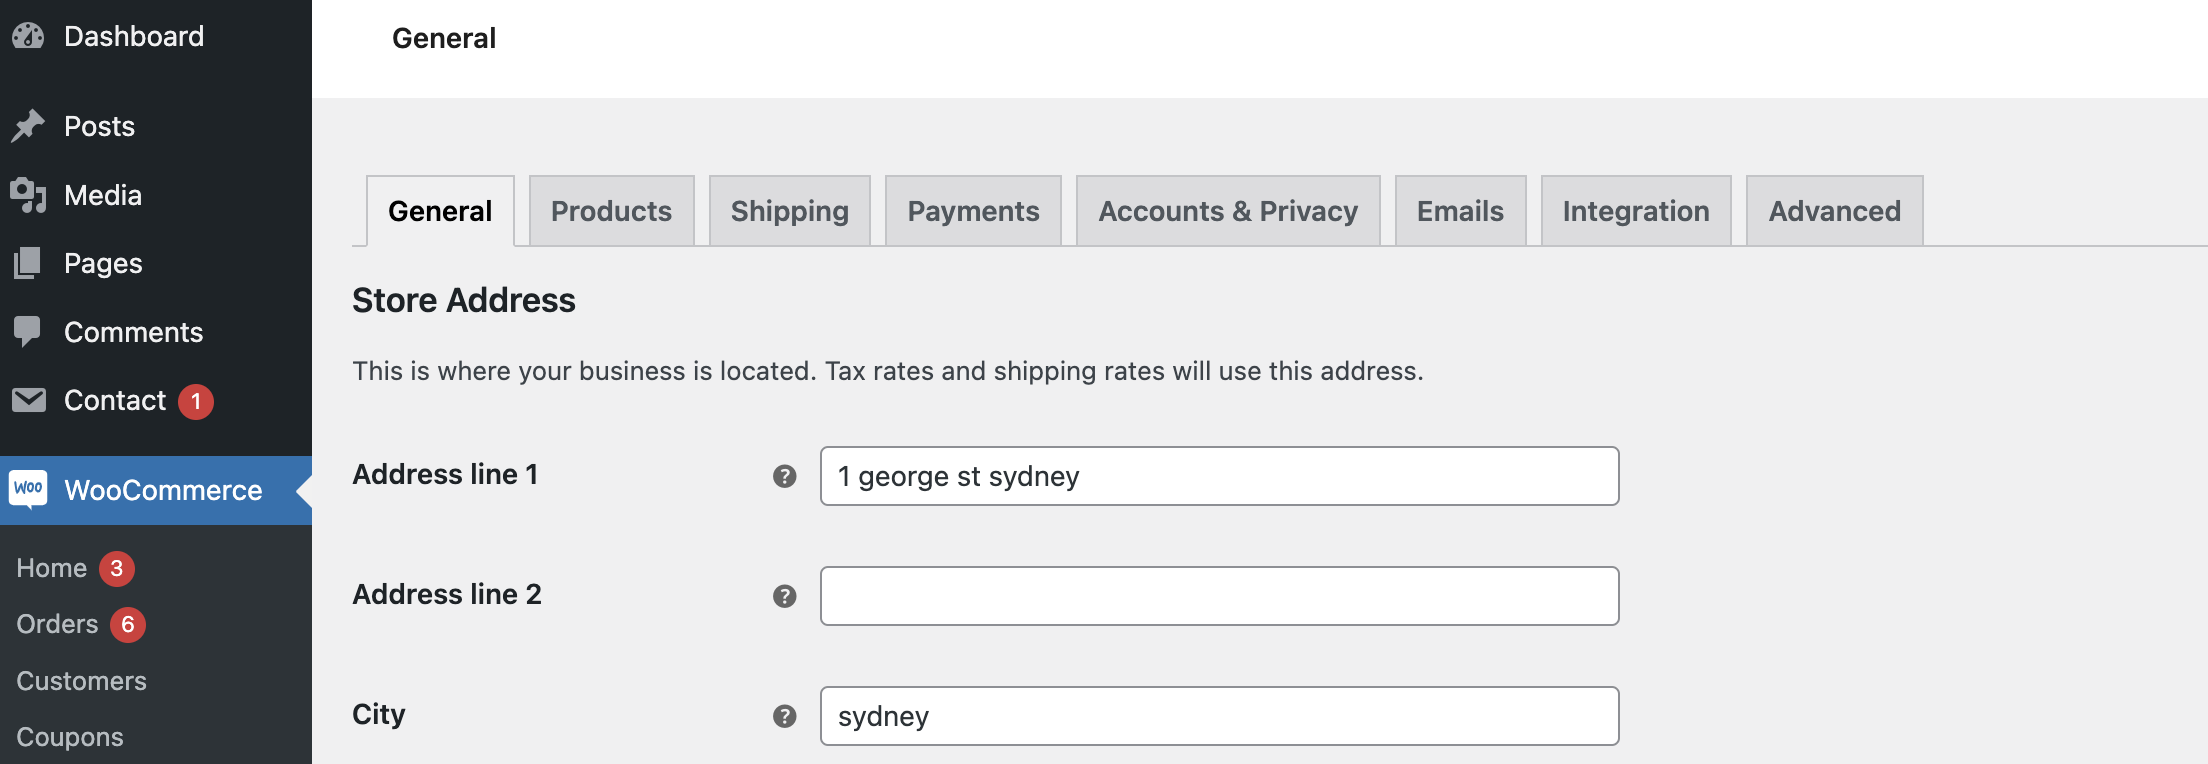
Under Dashboard > WooCommerce > Settings there is a panel of tabs that contains the various core settings that WooCommerce ships with. Some plugins add their own custom tab here to hold their settings data.
Adding a Settings Tab to WooCommerce Settings Page
To create a tab of our own, we need three hooks.
- the
woocommerce_settings_tabs_arrayhook to add the tab itself - the
woocommerce_settings_<array_key>hook to add content to the tab, and - the
woocommerce_update_options_<array_key>hook to save the data into the wp_options table
The woocommerce_settings_tabs_array hook adds an entry to an array of tabs which are then rendered onto the settings page by WooCommerce. The array key for our custom tab will be used to replace the <array_key> segment of the other two hook names.
Creating the Custom Tab – woocommerce_settings_tabs_array hook
First, we’ll use the woocommerce_settings_tabs_array hook, to put the tab itself into the array of tabs. This one’s pretty self explanatory – it does what it says on the box. I’ve just added the following code to the woosettings.php file below the header comments. It takes a $tabs parameter (which is an array of tab names) and I’ve added an array element to it with a unique key, and set the label.
add_filter('woocommerce_settings_tabs_array','clario_add_settings_tab',50);

function clario_add_settings_tab($tabs) {
  $tabs['prod_cat_addon'] = __('Product Addon by Category','clario_product_addon');
//  echo '<pre>';print_r($tabs);echo '</pre>';
  return $tabs;
}
If you want to find out what’s in the original $tabs parameter, you can uncomment the second line in the above function, and you’ll get this printed to the screen:
Array
(
    [general] => General
    [products] => Products
    [shipping] => Shipping
    [checkout] => Payments
    [account] => Accounts & Privacy
    [email] => Emails
    [integration] => Integration
    [advanced] => Advanced
    [prod_cat_addon] => Product Addon by Category
)
So, we’ve just added the prod_cat_addon element to the array and now when I go to the settings page I can see there is a new tab there, and in that tab, a new blank page with a save button – all practically for free!
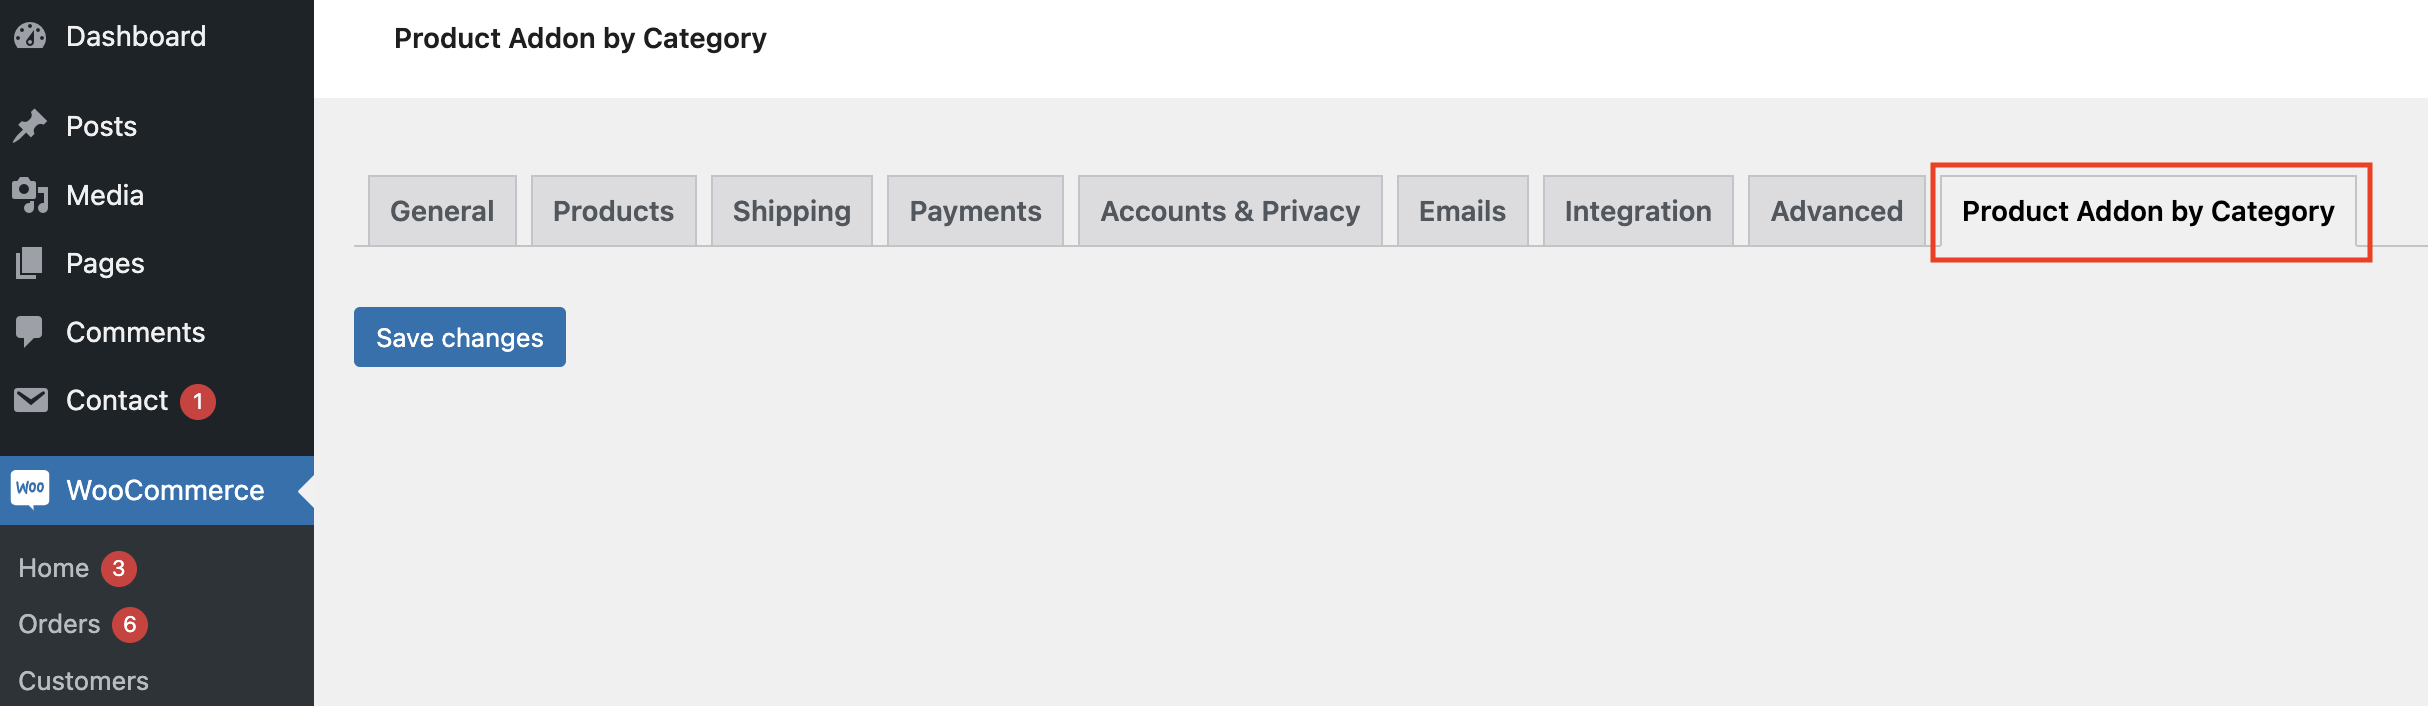
Additionally, once I go to the new tab I can see that the tab ID is being used in the query string of the url:
https://www.woo.clareivers.com/wp-admin/admin.php?page=wc-settings&tab=prod_cat_addonAdding Content to the New Settings Page
To add content to the new settings page, we need to use the woocommerce_settings_<array_key> hook. The <array_key> part of the hook name needs to correspond to the key value we used when we set up the tab in the above function, so in our case it’ll be woocommerce_settings_prod_cat_addon.
In it I’m going to output a checkbox list of all the product categories so that the user can select which product categories the product addon should be added to, and a dropdown list of the products so that they can select the addon itself.
Getting Product Categories
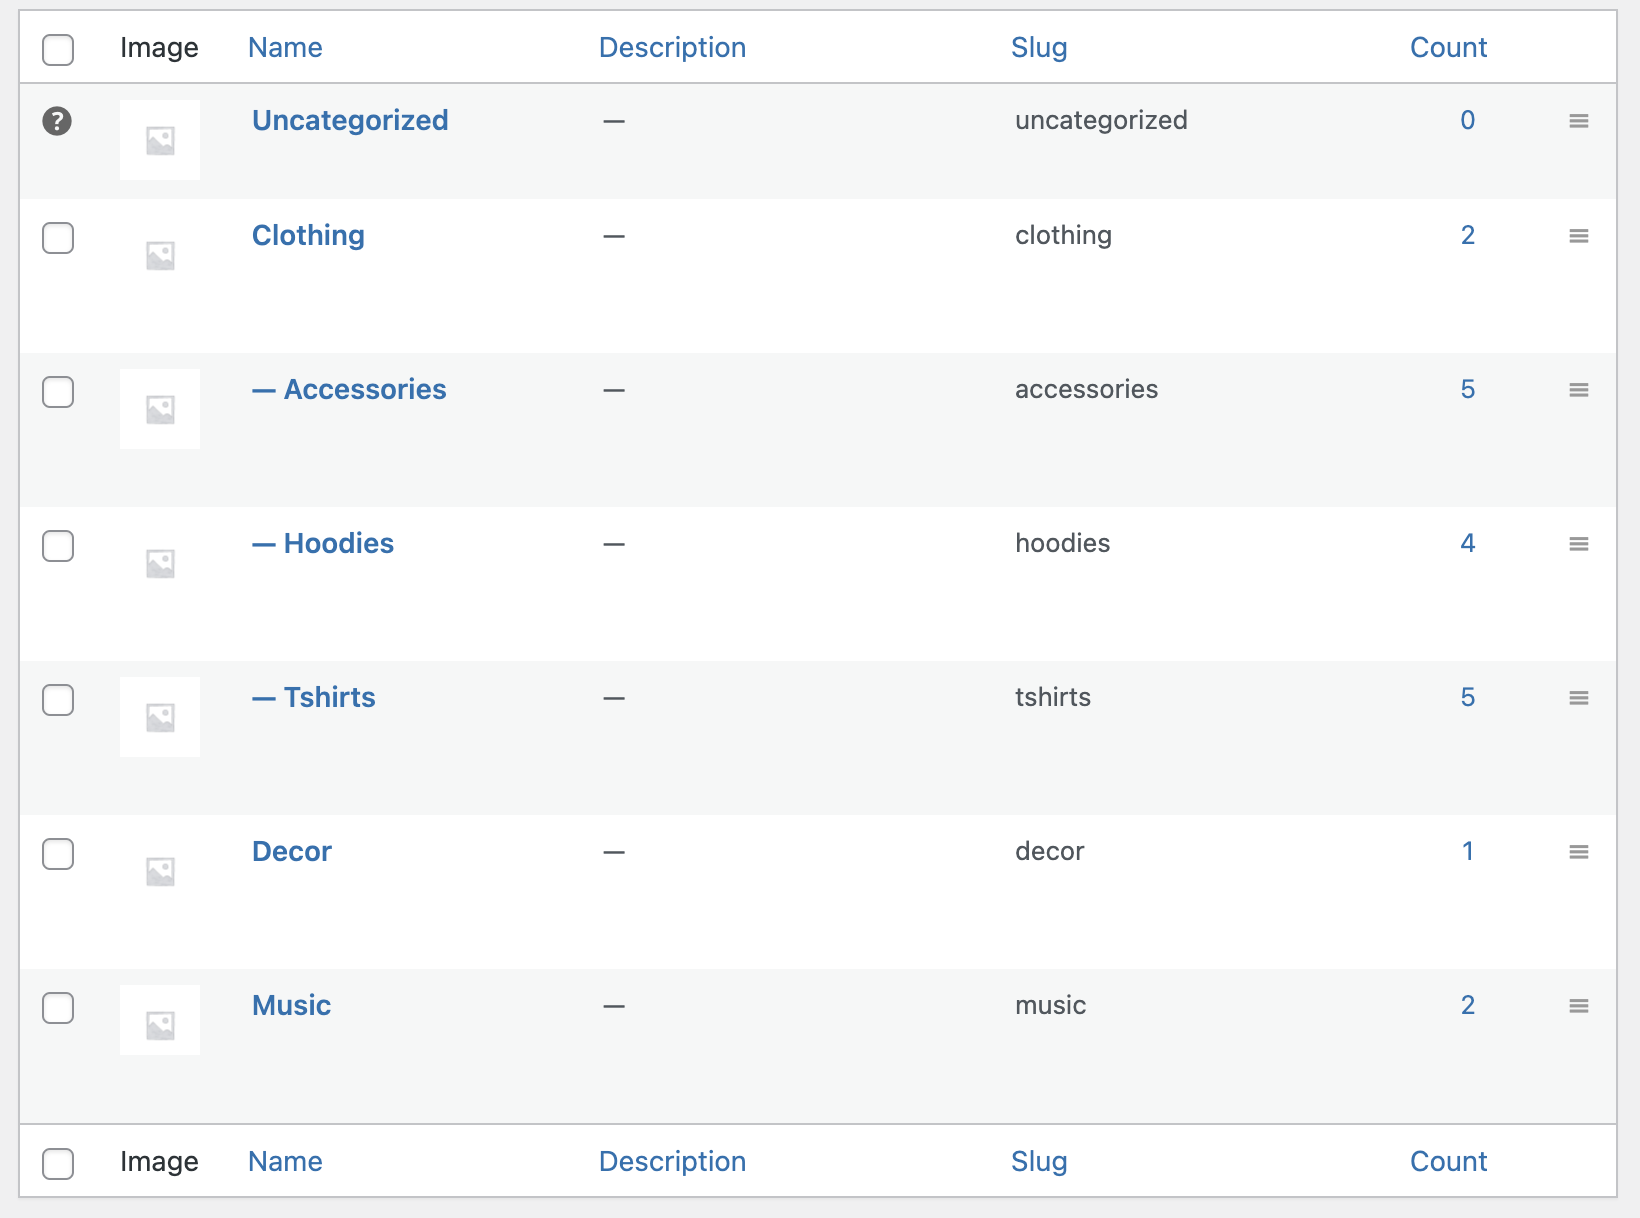
Here are my product categories – these are from WooCommerce sample data – and I pretty much want to output them on the settings tab in the structure they have here (from Admin Dashboard > Products > Categories):
I’ll use three helper functions – two to get and output product categories, and a third to get the product list dropdown.
Get and Output Product Categories Hierarchically
I need two helper functions for the product categories because they are hierarchical and I’ll need recursive functions to get the child categories.
The first function will get and loop through the product categories. It’ll test each category to see if it is a child category and if it is, tell the function to re-call itself to get that category and store it as a child of its parent:
function clario_get_categories_hierarchical( $parent, $args ) {

  $cat  = new stdClass();
  $categories = get_categories( $args );

  foreach ( $categories as $category ) {
    if ( $category->parent == $parent ) { // test if cat has child cat
      $id                 = $category->cat_ID;
      $cat->$id           = $category;
      $cat->$id->children = clario_get_categories_hierarchical( $id, $args ); // call itself again to get child cat info
    }
  }
  return $cat;
}
This function orders and structures the categories into their hierarchy. It takes a parent category (initially hard coded to zero – the base parent category) and an array of arguments which is the parameter for the WP get_categories function. The $args argument will be this:
  $args = array(
    'hide_empty'   => 0,
    'taxonomy'     => 'product_cat',
    'exclude'      => 15, // exclude the uncategorised category
  );
I’m getting the product categories by specifying ‘product_cat’ as the taxonomy value – you can find this in the taxonomy portion of the URL on the product categories page (Dashboard > Products > Categories), and I’m excluding the Uncategorised category using its ID. You may need to change the ID value – you can get yours by clicking on the Uncategorised category on this page and getting the tag_ID parameter out of the query string in the URL:
https://yourdomain.com/wp-admin/term.php?taxonomy=product_cat&tag_ID=15&post_type=productOutputting Checkboxes
This function is also recursive and loops through the results of the first recursive function, outputting the HTML code for the checkboxes. It checks if the category contains children and then recalls itself to output the HTML for those children.
function clario_category_checkboxes( $categories, $level, $idx,$checked ) {

  if ( $categories ) {
    $idx++;
    $dashes = '';
    for ( $i = 0; $i < $level; $i++ ) {
      $dashes .= '- ';
    }
    foreach ( $categories as $category ) {
      echo '<input type="checkbox"
                   id="' . $category->slug . '"
                   name="woosettingsdata[categories][' . $category->cat_ID . ']"
                   value="Yes" ' .
                   checked( array_key_exists($category->cat_ID, $checked), 1, false ) . '>
            <label for="' . $category->slug . '">' .
                   $dashes . $category->name . '
            </label><br>';

      if ( $category->children
            && count( (array) $category->children ) > 0 ) {
        clario_category_checkboxes( $category->children, $level + 1,$idx,$checked );
      }
    }
  } else {
    echo esc_html__( 'No categories found.', 'woocommerce' );
  }

}
You can see I’ve set the name field for the input elements to be woosettingsdata[categories][' . $category->cat_ID . ']. This is so that when we save the data later, it will already be organised in the $_POST variable as an associative array.
Additionally, this function has a parameter $checked which will contain saved data from the database (which we haven’t done yet). If there is data in the DB, the checkboxes will be checked according to what’s in that data, otherwise, it will just be the raw output of the product categories (we’ll see this in Putting it all Together).
Getting the Product Dropdown
Now we’ll use a third helper function to get the products in a dropdown list. The user will be able to select a product addon to add to each of the products in the selected categories in the above checkbox list.
function clario_get_product_dropdown() {
  $selected_product =  get_option('clario_woosettings')['product-addon-id'];

  $products = wc_get_products( array(
    'orderby' => 'name',
    'order' => 'DESC',
  ));

  $html = '<h2>Choose Product Addon</h2>
           <select
             name="woosettingsdata[product-addon-id]"
             id="product-addon-products">
             <option value="">Select product...</option>';

  foreach ($products as $product) {
    $selected = $product->get_ID() == $selected_product ? ' selected' : '';
    $html .= '<option value="' .
                $product->get_ID() . '"' .
                $selected .'>' .
                $product->get_name() .
             '</option>';
  }
  $html .= '</select>';

 return $html;
}
Here I’m using wc_get_products to get all the products and order them by name. I’m then looping through them to output select options. Like the helper function above, this function will use data from the DB to set one of the options as selected. This is what is being retrieved in this line:
$selected_product = get_option('clario_woosettings')['product-addon-id'];Also, similar to the above function, I’ve set the name value of the select element to be woosettingsdata[product-addon-id] so that the data will be present in the $_POST variable on save.
Putting the woocommerce_settings_prod_cat_addon Hook Together
Now I’ll use the woocommerce_settings_prod_cat_addon hook to call all the helper functions and output the checkboxes and dropdown on the settings page:
add_action('woocommerce_settings_prod_cat_addon','clario_woo_settings_page');

function clario_woo_settings_page() {

  $args = array(
    'hide_empty'   => 0,
    'taxonomy'     => 'product_cat',
    'exclude'      => 15, // exclude the uncategorised category
  );

  $checkedcats =  isset(get_option('clario_woosettings')['categories']) ? get_option('clario_woosettings')['categories'] : array();
  $cats =  clario_get_categories_hierarchical(0,$args);

  echo '<h2>Choose Product Categories to apply Addon Product to:</h2>';
  echo '<div id="woosettings_product_categories">';
  clario_category_checkboxes($cats,0,0,$checkedcats); // pass checked categories here to set the checked ones
  echo '</div>';

  $dropdown = clario_get_product_dropdown();
  echo $dropdown;

  wp_nonce_field('woosettings_woo_settings','woosettings_nonce');

}
In this function I’m getting either a categories value from the database (which we’ll save in the next hook) or, if there is nothing there, an empty array in this line:
$checkedcats = isset(get_option('clario_woosettings')['categories']) ? get_option('clario_woosettings')['categories'] : array();Because this is part of a form (which WooCommerce has provided to us when we created the settings tab) we need to add a nonce to it, which I’ve done in the last line of the function:
wp_nonce_field('woosettings_woo_settings','woosettings_nonce');Add CSS Styling
Now we’ll throw in some quick css to make it look better. I’ve added a style.css file in the root of my plugin directory, and this code at the top of my woosettings.php file:
add_action('admin_enqueue_scripts','clario_admin_scripts');

function clario_admin_scripts() {
  wp_enqueue_style('woosettings-css',plugins_url( 'style.css',__FILE__),array(),time());
}
I’ve used the admin_enqueue_scripts hook to load the scripts on the admin side – remember this is different to the wp_enqueue_scripts hook which is used to load scripts for the front end – and inside the hooked function, wp_enqueue_style to load the css file in the WordPress way.
Then in the css file, I’ve got the following code:
 #woosettings_product_categories {
    padding: 10px;
    border: 1px solid;
    border-radius: 5px;
    width: 200px;
    background-color: white;
}
My settings page now looks like this:
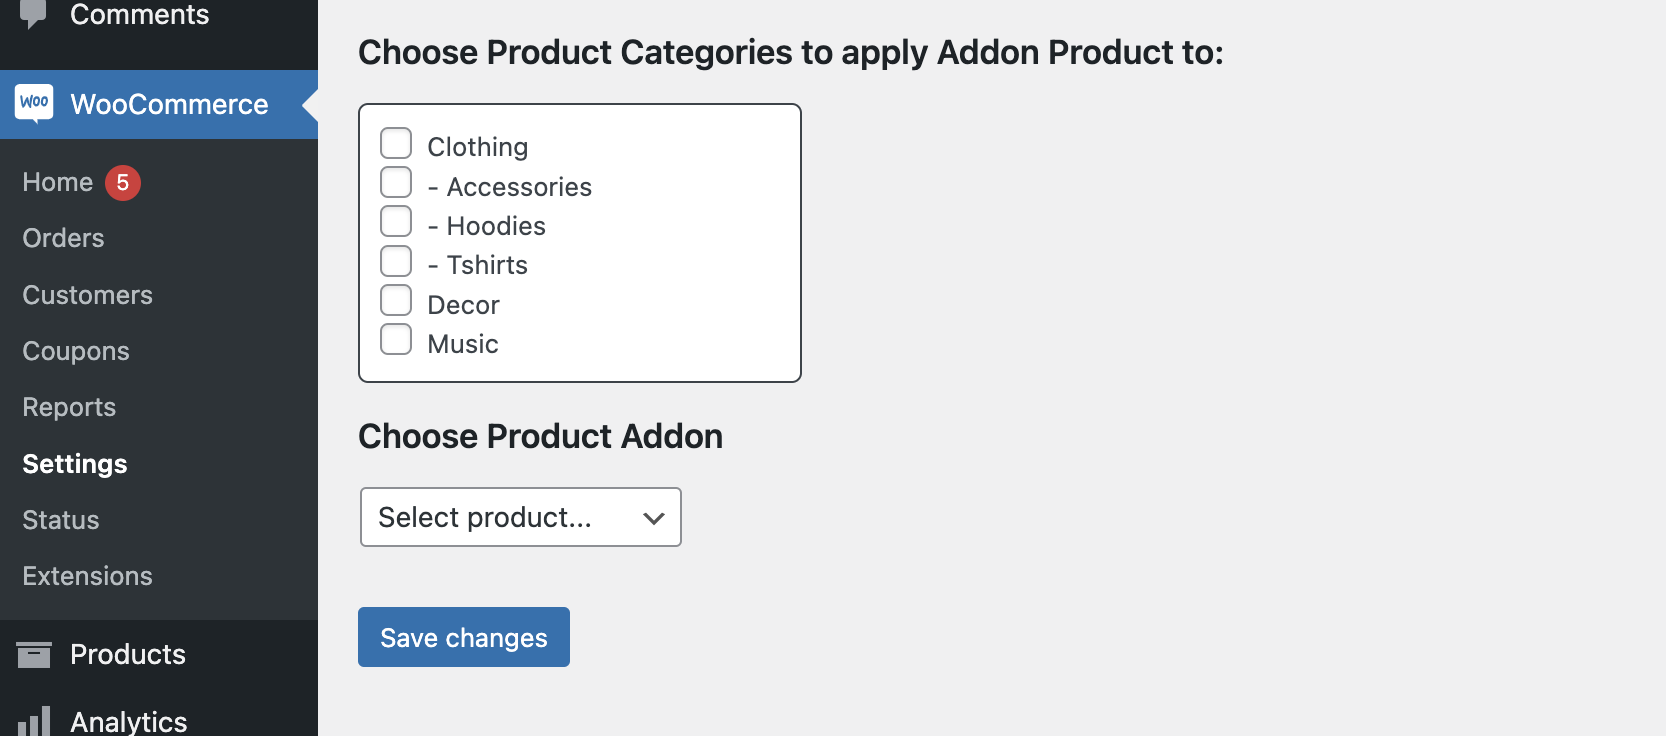
Next we’ll set up the third settings hook to save the data to the database.
Saving Categories & Product to the Database
The third hook we need is the woocommerce_update_options_<array_key> hook. Like the woocommerce_settings_<array_key> hook it uses the array key we set up in the settings tab hook. I’ve just set this hook up to write the $_POST variable to the WordPress debug log file so we can see what we’re getting:
add_action('woocommerce_update_options_prod_cat_addon','clario_update_woosettings');

function clario_update_woosettings() {
  error_log(print_r( $_POST, true ));

}
If I check a couple of the checkboxes and select a product from the dropdown, this is what I get:
[31-Oct-2022 05:36:58 UTC] Array
(
    [woosettingsdata] => Array
        (
            [categories] => Array
                (
                    [26] => Yes
                    [25] => Yes
                )

            [product-addon-id] => 26
        )

    [woosettings_nonce] => ee41d96c07
    [_wp_http_referer] => /wp-admin/admin.php?page=wc-settings&tab=prod_cat_addon
    [save] => Save changes
    [_wpnonce] => 2d4622c54d
)
First I’ll verify the nonce contained in the woosettings_nonce element and then I’ll save the woosettingsdata element to the database using the WP Options API:
function clario_update_woosettings() {

  if (empty($_POST['woosettings_nonce']) || !wp_verify_nonce($_POST['woosettings_nonce'],'woosettings_woo_settings')) return;

  update_option('clario_woosettings',$_POST['woosettingsdata']);

}
Now I have both the selected product categories and the product addon itself in the wp_option table with the option name clario_woosettings. In the above helper functions I’ve used that data to check the relevant checkboxes and select the chosen select option.
Showing the Product on the Product Page
To show the product addon on the product page, I’m going to use and slightly alter my code from my previous post:
add_action( 'woocommerce_before_add_to_cart_button', 'clario_show_addon_product_by_product_category' );

function clario_show_addon_product_by_product_category() {

  global $product;

  $cat_prod_addon =  get_option('clario_woosettings');
  $cats = get_the_terms($product->get_ID(), 'product_cat');

  if ( clario_product_in_category( $cats, $cat_prod_addon['categories'] ) ) {
    $prod_addon = wc_get_product( $cat_prod_addon['product-addon-id'] );
    echo
    '<div class="product-addon-checkbox">
      <input type="checkbox"
             id="clario_category_product_addon"
             name="clario_category_product_addon"
             value="YES">
      <label for="clario_category_product_addon">
        <strong>Add a
          <a
            href="' . $prod_addon->get_permalink() . '"
            target="_blank">' . $prod_addon->get_name() .
          '</a> to your purchase for $' . $prod_addon->get_price() . '?</strong>
      </label>
    </div>';
  }
}
I’m using the woocommerce_before_add_to_cart_button hook which executes on the product page and places the output of the hooked function before the add to cart button.
I’m using global $product; to get the current product and I’m getting the clario_woosettings options data, to compare to the current product and choose whether to show it on the page. I have a helper function to do this because I need to compare two arrays (the one saved in the database and the array of product categories that the product is in). The helper function loops through the product categories that are checked on the settings page and returns true if the product is in one of those categories. If not it returns false. It uses array_key_exists for this:
function clario_product_in_category($product_categories,$selected_categories) {

  foreach($product_categories as $pc) {
    if ( array_key_exists( $pc->term_id, $selected_categories ) ) {
      return true;
    }
  }

  return false;

}
If the addon should be displayed, I’m getting the addon by product ID from the value stored in the database using the wc_get_product function from WooCommerce. Then I’m outputting its details in some HTML.
Styling for Product Page
Now I have a product addon conditionally being rendered on the products that are in the checked product categories. Let’s throw on a bit of styling for the product addon. Using the wp_enqueue_scripts hook I’m going to load my style.css for the front end (you would probably break this file into two, one for the admin, one for the FE, but I’ll just use one here):
add_action('wp_enqueue_scripts','clario_fe_scripts');

function clario_fe_scripts() {
  wp_enqueue_style('woosettings-fe-css',plugins_url( 'style.css',__FILE__),array(),time());
}
Then add the css to style.css
.product-addon-checkbox {
    padding: 25px 15px;
    border: solid 1px lightgrey;
    margin-bottom: 20px;
}
.product-addon-checkbox label {
    padding-left: 5px;
}
Now I have a product addon on selected product pages that looks like this:
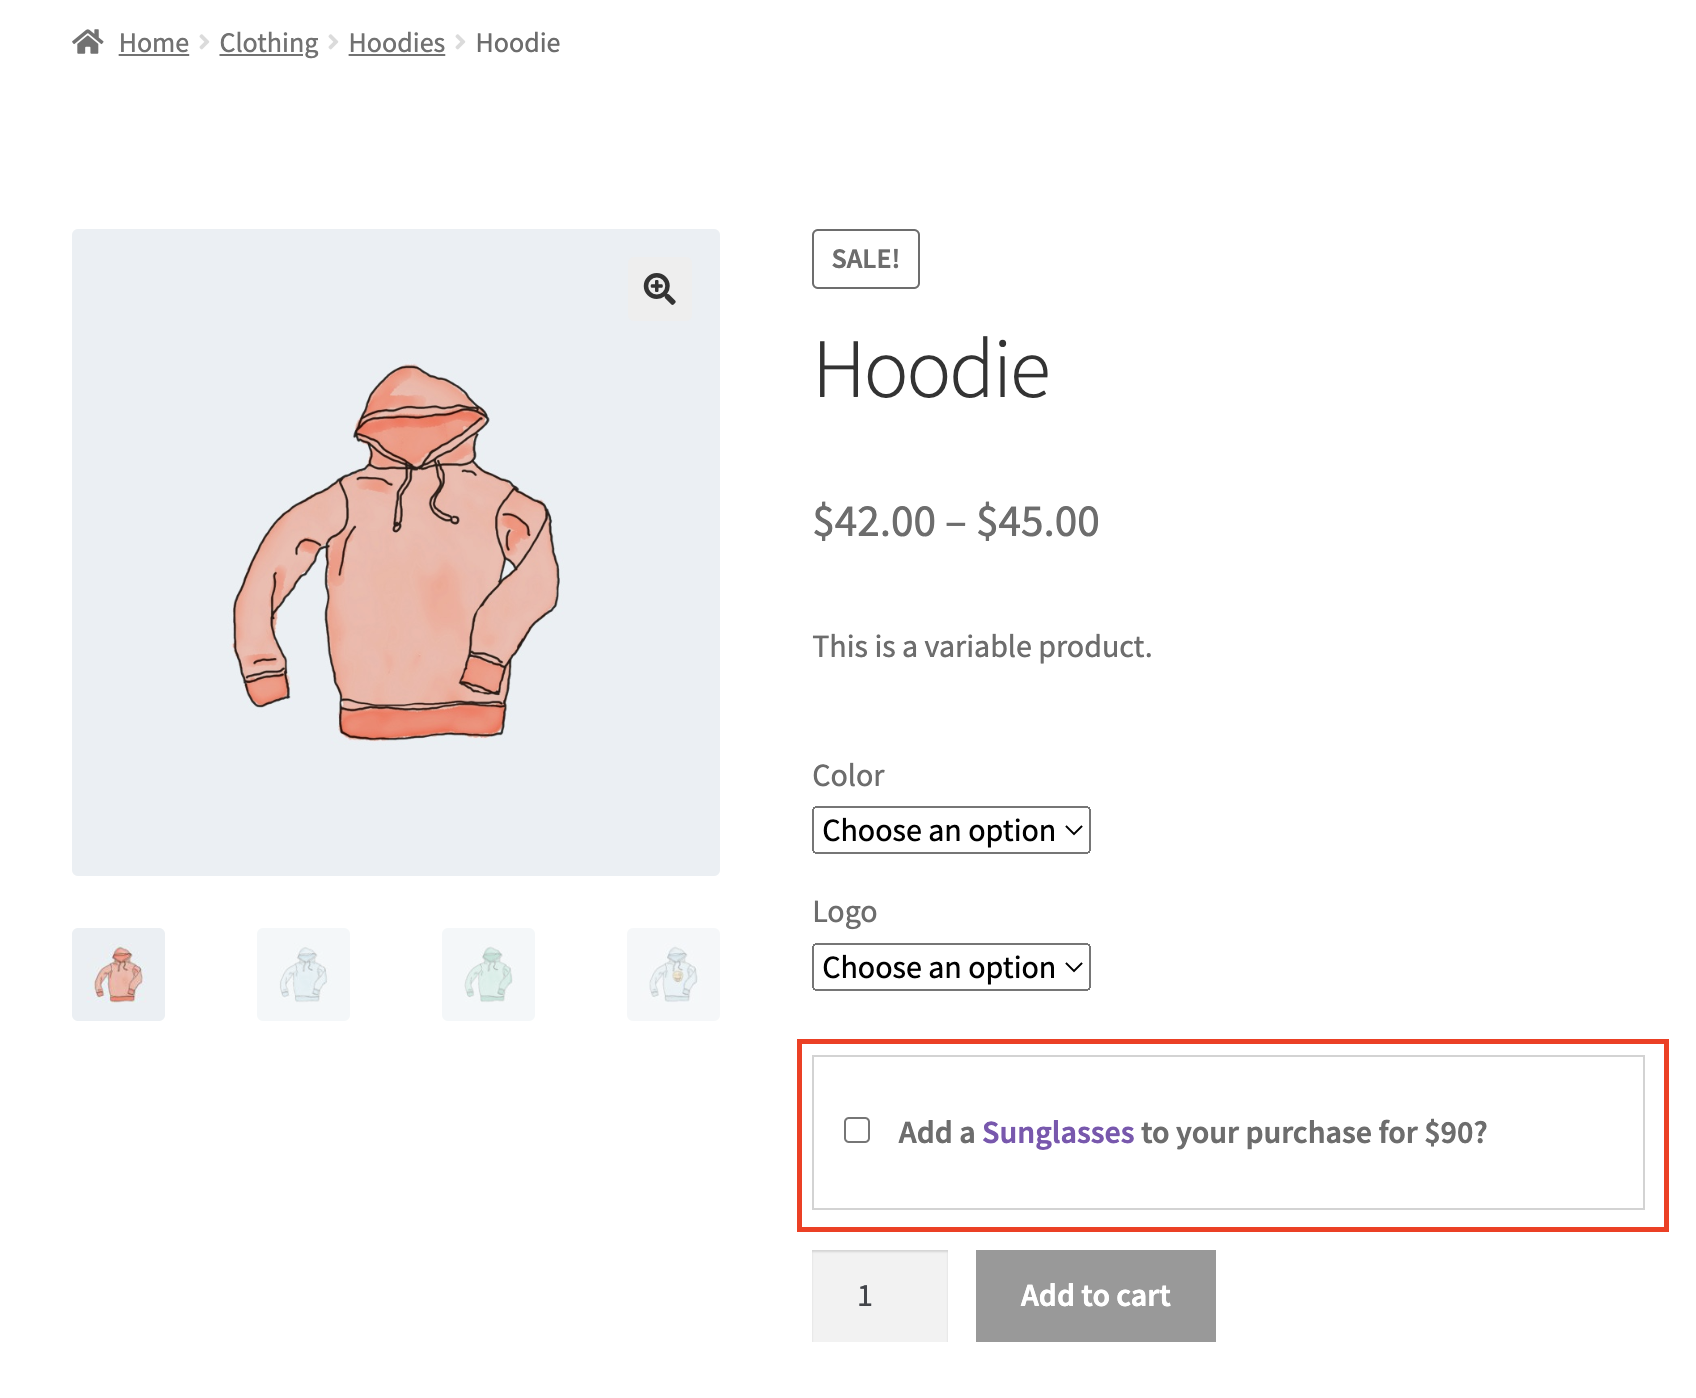
Add the Addon To the Cart on “Add to Cart” Button Click
In my previous post, because the addon wasn’t an actual product in WooCommerce but rather a dollar amount and a label, we had to pass it through to the cart page, checkout page, thank you screen, order email and the order itself in the backend. But since in this case the addon is an actual product, we can just add it to the cart with the Add to cart button click. We’ll use the woocommerce_before_calculate_totals hook to do this:
add_filter( 'woocommerce_before_calculate_totals', 'clario_add_addon_to_cart', 10, 3 );

function clario_add_addon_to_cart( $cart ) {
  error_log('add to cart hook...'); error_log(print_r( $_POST, true ));
}
When I select some options on the variable product, check the addon checkbox and click the Add to cart button, the $_POST variable looks like this:
[01-Nov-2022 00:53:39 UTC] Array
(
    [attribute_pa_color] => blue
    [attribute_logo] => No
    [clario_category_product_addon] => YES
    [clario_category_product_addon_id] => 30
    [quantity] => 1
    [add-to-cart] => 24
    [product_id] => 24
    [variation_id] => 42
)
If the clario_category_product_addon element is set to ‘YES’ I’ll add the product with the ID from the clario_category_product_addon_id element to the cart:
add_filter( 'woocommerce_before_calculate_totals', 'clario_add_addon_to_cart', 10, 3 );

function clario_add_addon_to_cart( $cart ) {
 if ( array_key_exists('clario_category_product_addon',$_POST ) &&
      $_POST['clario_category_product_addon'] === 'YES'
        && did_action( 'woocommerce_before_calculate_totals' ) <= 1 )  {
      global $woocommerce;
      $woocommerce->cart->add_to_cart( $_POST['clario_category_product_addon_id'] );
    }
}
Important! I have a clause in here that checks if the woocommerce_before_calculate_totals hook has already fired – if you don’t have this check, you’ll end up in an infinite loop, because the act of adding a product to the cart in the hook will fire the hook again! I’ve used the did_action hook for this.
And that’s it. Now if you add the main product to the cart with the addon checked, the addon will also be added to the cart and will flow through the subsequent pages and into the order and order emails!
If I’ve helped you, please feel free to buy me a beer! Or jump to the full code.
The Full Code
<?php
/**
 * Plugin Name:       Woo Settings
 * Description:       Adding a settings tab to WooCommerce
 * Version:           0.1
 * Author:            Clare Ivers
 * Author URI:        https://clareivers.com/
 * License:           GPL v2 or later
 * License URI:       https://www.gnu.org/licenses/gpl-2.0.html
 * Update URI:        https://example.com/my-plugin/
 * Text Domain:       woosettings
 */

add_action('admin_enqueue_scripts','clario_admin_scripts');

function clario_admin_scripts() {
  wp_enqueue_style('woosettings-css',plugins_url( 'style.css',__FILE__),array(),time());
}

add_action('wp_enqueue_scripts','clario_fe_scripts');

function clario_fe_scripts() {
  wp_enqueue_style('woosettings-fe-css',plugins_url( 'style.css',__FILE__),array(),time());
}

add_filter('woocommerce_settings_tabs_array','clario_add_settings_tab',50);

function clario_add_settings_tab($tabs) {
  $tabs['prod_cat_addon'] = __('Product Addon by Category','clario_product_addon');
//  echo '<pre>';print_r($tabs);echo '</pre>';
  return $tabs;
}

add_action('woocommerce_settings_prod_cat_addon','clario_woo_settings_page');

function clario_woo_settings_page() {

  $args = array(
    'hide_empty'   => 0,
    'taxonomy'     => 'product_cat',
    'exclude'      => 15, // exclude the uncategorised category
  );

  $checkedcats =  isset(get_option('clario_woosettings')['categories']) ? get_option('clario_woosettings')['categories'] : array();
  $cats =  clario_get_categories_hierarchical(0,$args);

  echo '<h2>Choose Product Categories to apply Addon Product to:</h2>';
  echo '<div id="woosettings_product_categories">';
  clario_category_checkboxes($cats,0,0,$checkedcats); // pass checked categories here to set the checked ones
  echo '</div>';

  $dropdown = clario_get_product_dropdown();
  echo $dropdown;

  wp_nonce_field('woosettings_woo_settings','woosettings_nonce');

}

function clario_get_categories_hierarchical( $parent, $args ) {

  $cat  = new stdClass();
  $categories = get_categories( $args );

  foreach ( $categories as $category ) {
    if ( $category->parent == $parent ) { // test if cat has child cat
      $id                 = $category->cat_ID;
      $cat->$id           = $category;
      $cat->$id->children = clario_get_categories_hierarchical( $id, $args ); // call itself again to get child cat info
    }
  }
  return $cat;
}

function clario_category_checkboxes( $categories, $level, $idx,$checked ) {

  if ( $categories ) {
    $idx++;
    $dashes = '';
    for ( $i = 0; $i < $level; $i++ ) {
      $dashes .= '- ';
    }
    foreach ( $categories as $category ) {
      echo '<input type="checkbox"
                   id="' . $category->slug . '"
                   name="woosettingsdata[categories][' . $category->cat_ID . ']"
                   value="Yes" ' .
                   checked( array_key_exists($category->cat_ID, $checked), 1, false ) . '>
            <label for="' . $category->slug . '">' .
                   $dashes . $category->name . '
            </label><br>';

      if ( $category->children
            && count( (array) $category->children ) > 0 ) {
        clario_category_checkboxes( $category->children, $level + 1,$idx,$checked );
      }
    }
  } else {
    echo esc_html__( 'No categories found.', 'woocommerce' );
  }

}

function clario_get_product_dropdown() {
  $selected_product =  get_option('clario_woosettings')['product-addon-id'];

  $products = wc_get_products( array(
    'orderby' => 'name',
    'order' => 'DESC',
  ));

  $html = '<h2>Choose Product Addon</h2>
           <select
             name="woosettingsdata[product-addon-id]"
             id="product-addon-products">
             <option value="">Select product...</option>';

  foreach ($products as $product) {
    $selected = $product->get_ID() == $selected_product ? ' selected' : '';
    $html .= '<option value="' .
                $product->get_ID() . '"' .
                $selected .'>' .
                $product->get_name() .
             '</option>';
  }
  $html .= '</select>';

 return $html;
}

add_action('woocommerce_update_options_prod_cat_addon','clario_update_woosettings');

function clario_update_woosettings() {

  if (empty($_POST['woosettings_nonce']) || !wp_verify_nonce($_POST['woosettings_nonce'],'woosettings_woo_settings')) return;

  update_option('clario_woosettings',$_POST['woosettingsdata']);

}

add_action( 'woocommerce_before_add_to_cart_button', 'clario_show_addon_product_by_product_category' );

function clario_show_addon_product_by_product_category() {

  global $product;

  $cat_prod_addon =  get_option('clario_woosettings');
  $cats = get_the_terms($product->get_ID(), 'product_cat');

  if ( clario_product_in_category( $cats, $cat_prod_addon['categories'] ) ) {
    $prod_addon = wc_get_product( $cat_prod_addon['product-addon-id'] );
    echo
    '<div class="product-addon-checkbox">
      <input type="checkbox"
             id="clario_category_product_addon"
             name="clario_category_product_addon"
             value="YES">
      <label for="clario_category_product_addon">
        <strong>Add a
          <a
            href="' . $prod_addon->get_permalink() . '"
            target="_blank">' . $prod_addon->get_name() .
          '</a> to your purchase for $' . $prod_addon->get_price() . '?</strong>
      </label>
    </div>';
  }
}

function clario_product_in_category($product_categories,$selected_categories) {

  foreach($product_categories as $pc) {
    if ( array_key_exists( $pc->term_id, $selected_categories ) ) {
      return true;
    }
  }

  return false;

}

add_filter( 'woocommerce_before_calculate_totals', 'clario_add_addon_to_cart', 10, 3 );

function clario_add_addon_to_cart( $cart ) {
 if ( array_key_exists('clario_category_product_addon',$_POST ) &&
      $_POST['clario_category_product_addon'] === 'YES'
        && did_action( 'woocommerce_before_calculate_totals' ) <= 1 )  {
      global $woocommerce;
      $woocommerce->cart->add_to_cart( $_POST['clario_category_product_addon_id'] );
    }
}