
This post will describe how to take an ad hoc payment on Webflow using Foxy. If you don’t want to set up a full eCommerce platform but you still have a business case for taking payments you might want to have a form on one of your web pages that allows you to write transactions to your Stripe account, or PayPay, CyberSource or, frankly, any of a really long list of payment gateways that Foxy integrates with.
You do need a small amount of code to do it, but it’s really not much, and it’s easy, and I’ll show you how step by step.
Set up Your Foxy Store
The first thing you need to do is set up your Foxy account and then add a Foxy store. It’s pretty easy – follow steps one and two in these instructions. Keep the page open, you’ll need some of the details in future steps.
Foxy is free until you actually start processing transactions at which point you’ll need to sign up for a subscription in order to activate your store.
Setup your UI scaffolding on Webflow
If you need an overview of how to use the Webflow designer you can find it here.
I’m using an imaginary business case – I service refrigerators, but I don’t sell them, so no need for a full on shop. I do want to give my customers the opportunity to book and pay for a service online though.
First I’ve created a layout that displays info about my product:

This is all just layout at the moment and it won’t do anything. You can go mad and add content and styling as you see fit, but just for reference, this is a closeup of the layout I have created:
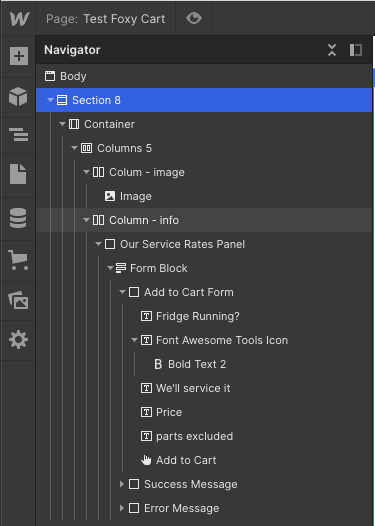
So, it’s a column element with two columns, an image in one and a form block in the other containing text and info. The form block is key to this functionality as we need to POST the form data to our Foxy URL.
Wire it up to Foxy
This part of the process follows the “Add to Cart” section of this page. We’ll go through it step by step.
Set the form method and action
Select the form from the navigator panel on the left hand side and then, on the panels on the right hand side, click settings (the cog in the top bar):
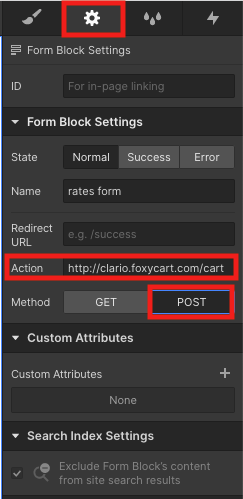
Here, I have set the form action to the value that I set on the store subdomain when I did the FoxyCart Setup, in the following format:
https://<store-subdomain>.foxycart.com/cartYou can replace <store-subdomain> in the above with your own store subdomain.
Below that, I’ve set the method to POST.
Add HTML Embed Element for Product Details
Now we need to include the product name, price and image inside the form in a format that Foxy can recognise so that when the form is submitted Foxy can grab those details and add them to the cart.
Here, I’ve just added an HTML embed element inside the form:
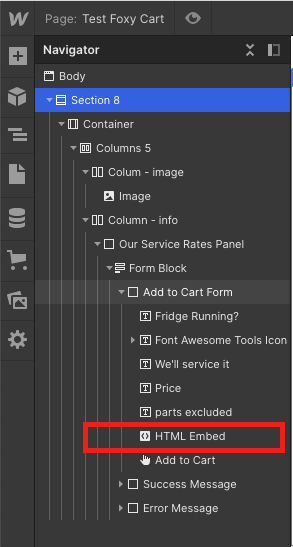
Inside the HTML Embed element, I’ve put the following code. You can see that it contains hidden input fields for the three data points I mentioned above that Foxy needs to add the product to the cart:
<input type="hidden" name="name" value="Refrigerator Full Service" />
<input type="hidden" name="price" value="235" />
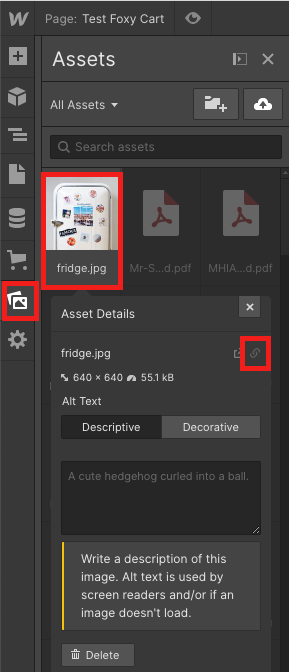
<input type="hidden" name="image" value="https://uploads-ssl.webflow.com/62e8d21ac129c3fc7448/633b3e0074bab08b7d6ba5_fridge.jpg" />The image input contains Webflow’s URL for the image I’ve uploaded. You can get it by clicking on the Assets Panel in the left panel section, hovering over the target image, clicking the cog in the top right corner and then clicking the link icon in the resulting panel:
Publish and Test
Now publish the page and open it. This is what my page looks like:

And when I click the Add to Cart button, Foxy adds the product to the cart and opens a sidecart on the page:
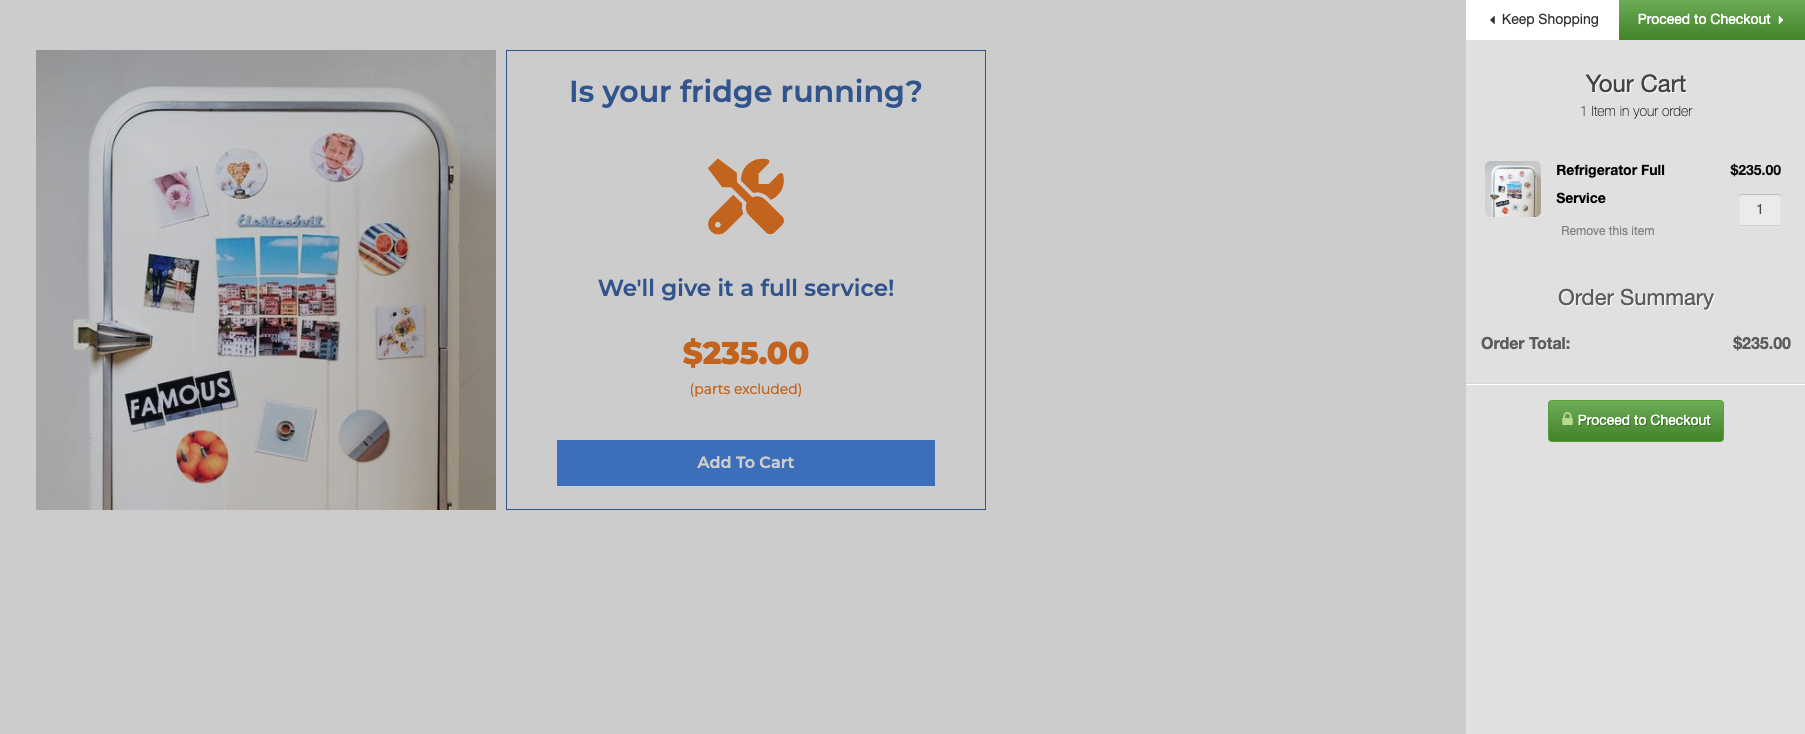
Super cool! Now I can proceed to checkout, or keep shopping.
Foxy Webflow Theme
If you want something more like an eCommerce platform you can use Foxy for that too, and they have a nice Webflow theme that you can clone if you don’t want to do too much custom building and styling yourself! Check it out! If you choose this route, all you need to do is swap out their product data for your own, and wire it up to your Foxy store. There is more info here at Foxy’s page on Webflow.